

Spring is a popular framework for developing java-based applications. Annotations are easy to use and they make the code more readable, being less xml based. This article provides a step by step approach on how to implement annotation based dependency injection using the Spring3 and Hibernate 3 open source java frameworks.
Author: Preeti Shenoy
Introduction
Spring is a popular framework for developing java-based applications. In initial versions of Spring, all the features like dependency injection (DI) were archived based on the xml configuration files. As the framework is evolving to version 3.x, the xml based configuration is enhanced by annotations based configuration. Annotations are easy to use, added in code at class, method or variable level. This makes code more readable, less xml based. In this article we will see how to use annotations based configuration in Spring 3, along with integration with Hibernate3 for data access layer.
Now let’s consider an example which we will implement using Spring3 and Hibernate 3 and see how to implement it step by step.
Problem Statement
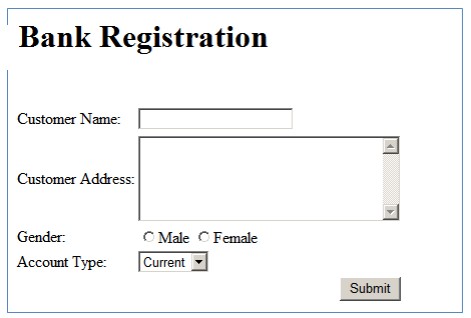
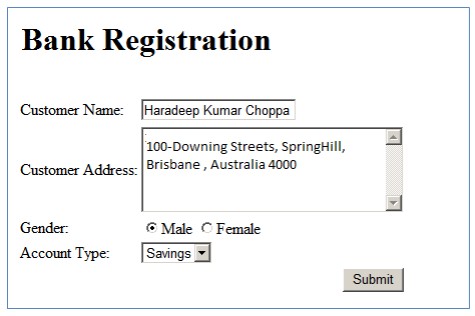
We will use as an example the creation a user bank account. In the first screen, the user is asked to fill up the account creation form. When this form is submitted, the user account is created in the database. If the creation of account is successful, a success message is displayed.
Design
Typically a web application consists of three layers:Presentation, Business and Persistence. In this example, the mapping between layer and framework is as follows
1. Presentation Layer: Struts 2.0 framework
2. Business Layer: Spring framework 3.0
3. Persistence Layer: Hibernate framework 3.0

To integrate the three layers, we will be using components below provided by different frameworks.
Context Loader Listener: This is used to integrate the Spring framework with other web frameworks like Struts. The declaration of this listener is done in web.xml.
Local Session Factory Bean: This is used to integrate Spring with Hibernate. It creates a local Hibernate SessionFactory instance, which can be used as a bean reference by the application that needs it. This declaration is done is the Spring configuration file.
Application Structure: The diagram below explains the design of the example we are considering for this demonstration.
welcome file
action=”createaccount” (struts.xml)
result=“successView”(struts.xml)
saveOrUpdate(bankAccount) / List<BankAccount>
fetchAllBankAccounts()
session.save(bankAccount) / List
session.createQuery()
Project files
web.xml
This is the deployment descriptor that is the entry point of our application and is present in WEB-INF directory. In this file, we configure StrutsPrepareAndExecuteFilter as the filter that enables the implementation of the Struts 2.0 framework in our demo. We also declare ContextLoaderListener as the listener, which is the plugin provided by the spring framework that facilitates struts-spring integration.
<?xml version="1.0" encoding="UTF-8"?>

<web-app id="WebApp_ID" version="2.4" xmlns="http://java.sun.com/xml/ns/j2ee" xmlns:xsi="http://www.w3.org/2001/XMLSchema-instance" xsi:schemaLocation="http://java.sun.com/xml/ns/j2ee http://java.sun.com/xml/ns/j2ee/web-app_2_4.xsd">

<display-name>Struts2Spring3Hibernate3Integration</display-name>

<filter>

<filter-name>struts2</filter-name>

<filter-class>

org.apache.struts2.dispatcher.ng.filter.StrutsPrepareAndExecuteFilter

</filter-class>

</filter>

<filter-mapping>

<filter-name>struts2</filter-name>

<url-pattern>/*</url-pattern>

</filter-mapping>

<context-param>

<param-name>contextConfigLocation</param-name>

<param-value>WEB-INF/appContext.xml</param-value>

</context-param>

<listener>

<listener-class>org.springframework.web.context.ContextLoaderListener

</listener-class>

</listener>

<welcome-file-list>

<welcome-file>register.jsp</welcome-file>

</welcome-file-list>

</web-app>
RegisterUser.jsp
This is the jsp page where we enter the user details and forward them to the database for the account creation. When the user clicks on the “Submit” button, the Struts2 filter invokes the action class that is defined in the ‘action’ attribute of ‘s:form’ tag.
<%@page contentType="text/html" pageEncoding="UTF-8"%>

<!DOCTYPE HTML PUBLIC "-//W3C//DTD HTML 4.01 Transitional//EN"

"http://www.w3.org/TR/html4/loose.dtd">

<%@taglib prefix="s" uri="/struts-tags" %>

<html>

<head>

<meta http-equiv="Content-Type" content="text/html; charset=UTF-8">

<title>Registration Page</title>

</head>

<body>

<center><h1>ABC Bank</h1></center>

<br/>

<br/>

<h2>Bank Registration</h2>

<s:form action="createaccount" >

<s:textfield name="custName" label="Customer Name"/>

<s:textarea name="custAddress" label="Customer Address" value="" cols="30" rows="5" />

<s:radio name="custGender" label="Gender" list="{'Male','Female'}" />

<s:select name="accountType" list="{'Current','Savings'}" label="Account Type" />

<s:submit name="Submit"/>

</s:form>

</body>

</html>
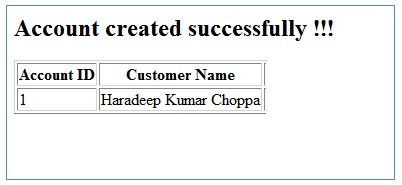
success.jsp
In this jsp page, we can see the list of all accounts created in this particular scope. Note that account id is the auto-generated primary key.
<%@ taglib prefix="s" uri="/struts-tags" %>

<%@ page language="java" contentType="text/html" import="java.util.*"%>

<html>

<head>

<title>Success Page</title>

</head>

<body>

<h2>Account created successfully !!!</h2>

<table border="1" >

<tr>

<th>Account ID</th>

<th>Customer Name</th>

</tr>

<s:iterator value="savedBankAccountList">

<tr>

<td><s:property value="accountId" /></td>

<td><s:property value="custName" /></td>

</tr>

</s:iterator>

</table>

</body>

</html>
struts.xml
This is the central configuration file which takes request from the client and forwards them to controller which in turn invokes the action class capable of handling client request. It also facilitates view redirection based on the return value of execute method in action class.
<!DOCTYPE struts PUBLIC

"-//Apache Software Foundation//DTD Struts Configuration 2.0//EN"

"http://struts.apache.org/dtds/struts-2.0.dtd">

<struts>

<package name="default" extends="struts-default">

<action name="createaccount">

<result name="successView">success.jsp</result>

<result name="input">RegisterUser.jsp</result>

</action>

</package>

</struts>
BankAccount.java
This is the model class that is used to populate the bean object based on the parameters in the request object. In this demo, we have used a model-driven approach that requires us to create separate classes for model and action.
package com.abcbank.model;

public class BankAccount

{

private int accountId;

private String custName;

private String custAddress;

private String custGender;

private String accountType;

public int getAccountId() {

return accountId;

}

public void setAccountId(int accountId) {

this.accountId = accountId;

}

public String getCustName() {

return custName;

}

public void setCustName(String custName) {

this.custName = custName;

}

public String getCustAddress() {

return custAddress;

}

public void setCustAddress(String custAddress) {

this.custAddress = custAddress;

}

public String getCustGender() {

return custGender;

}

public void setCustGender(String custGender) {

this.custGender = custGender;

}

public String getAccountType() {

return accountType;

}

public void setAccountType(String accountType) {

this.accountType = accountType;

}

}
CreateAccountAction.java
This is the action class that runs the business logic on the Model component of the application and modifies the contents of the database if necessary. Once the action is performed and the result is obtained, the control is returned back to the controller.
Since we are using a model driven approach, we need to override the getModel() method of ModelDriven and return an instance of model class.
package com.abcbank.action;

import com.abcbank.model.BankAccount;

import com.abcbank.dao.BankAccountDAO;

import java.util.ArrayList;

import java.util.List;

import com.opensymphony.xwork2.ActionSupport;

import com.opensymphony.xwork2.ModelDriven;

public class CreateAccountAction extends ActionSupport implements ModelDriven<BankAccount>

{

private BankAccount bankAccount=new BankAccount();

private BankAccountDAO bankAccountDAO;

List<BankAccount> savedBankAccountList = new ArrayList<BankAccount>() ;

public BankAccount getModel()

{

return bankAccount;

}

public String execute() throws Exception

{

bankAccountDAO.saveOrUpdate(bankAccount);

savedBankAccountList=bankAccountDAO.fetchAllBankAccounts();

return "successView";

}

public BankAccount getBankAccount() {

return bankAccount;

}

public void setBankAccount(BankAccount bankAccount) {

this.bankAccount = bankAccount;

}

public void setBankAccountDAO(BankAccountDAO bankAccountDAO) {

this.bankAccountDAO = bankAccountDAO;

}

public List<BankAccount> getSavedBankAccountList() {

return savedBankAccountList;

}

public void setSavedBankAccountList(List<BankAccount> savedBankAccountList) {

this.savedBankAccountList = savedBankAccountList;

}

}
IBankAccount.java
public interface IBankAccount {

public void saveOrUpdate(BankAccount bankAccount) ;

public List<BankAccount> fetchAllBankAccounts() ;

}
BankAccountDAO.java
This class is a spring framework component that enables the usage of Hibernate framework in our demo. In this class we can access the persistence resource which is SessionFactory in the case of Hibernate.
package com.abcbank.dao;

import com.abcbank.model.BankAccount;

import java.util.List;

import org.hibernate.Query;

import org.hibernate.Session;

import org.hibernate.SessionFactory;

@Component

public class BankAccountDAOImpl implements IBankAccount

{

private SessionFactory sessionFactory ;

public void setSessionFactory(SessionFactory sessionFactory)

{

this.sessionFactory = sessionFactory;

}

@Override

public void saveOrUpdate(BankAccount bankAccount)

{

Session session = sessionFactory.openSession();

session.beginTransaction().begin();

session.save(bankAccount);

session.beginTransaction().commit();

}

@Override

public List<BankAccount> fetchAllBankAccounts()

{

Session session = sessionFactory.openSession();

Query query = session.createQuery("from BankAccount");

List<BankAccount> list = (List<BankAccount>)query.list();

return list;

}

}
BankAccount.hbm.xml
This is the mapping file which has the details about the object that needs to be persisted to the database.
<?xml version="1.0" encoding="UTF-8"?>

<!DOCTYPE hibernate-mapping PUBLIC "-//Hibernate/Hibernate Mapping DTD 3.0//EN"

"http://hibernate.sourceforge.net/hibernate-mapping-3.0.dtd">

<hibernate-mapping>

<class name="com.abcbank.model.BankAccount" table="BankAccount">

<id name="accountId" column="ACC_ID">

<generator/>

</id>

<property name="custName"><column name="CUST_NAME"/></property>

<property name="custAddress"><column name="CUST_ADDRESS"/></property>

<property name="custGender"><column name="CUST_GENDER"/></property>

<property name="accountType"><column name="ACC_TYPE"/></property>

</class>

</hibernate-mapping>
appContext.xml
This is a spring configuration file which has details of the database that our business logic should access. All the user defined files (classes,xml..) are to be declared as beans here.
<?xml version="1.0" encoding="UTF-8"?>

<beans xmlns="http://www.springframework.org/schema/beans"

xmlns:xsi="http://www.w3.org/2001/XMLSchema-instance"

xmlns:context="http://www.springframework.org/schema/context"

xsi:schemaLocation="http://www.springframework.org/schema/beans http://www.springframework.org/schema/beans/spring-beans-3.0.xsd

http://www.springframework.org/schema/context http://www.springframework.org/schema/context/spring-context-3.0.xsd">

<!-- DispatcherServlet Context: defines this servlet's request-processing infrastructure -->

<!-- Enables the Spring MVC @Controller programming model -->

<mvc:annotation-driven/>

<bean id="myDataSource" destroy-method="close">

<!-- <bean id="myDataSource" destroy-method="close"> -->

<property name="driverClassName" value="oracle.jdbc.driver.OracleDriver"/>

<property name="url" value="jdbc:oracle:thin:@xxxxxxx:xxxx:xxxxx" ></property>

<property name="username" value=" "></property>

<property name="password" value=" "></property>

</bean>

<bean id="sessionFactory">

<!-- <bean id="sessionFactory"> -->

<property name="dataSource" ref="myDataSource"/>

<property name="mappingResources">

<list>

<value>com/abcbank/model/BankAccount.hbm.xml</value>

</list>

</property>

<property name="hibernateProperties">

<props>

<prop key="hibernate.dialect">org.hibernate.dialect.OracleDialect</prop>

<prop key="hibernate.show_sql">true</prop>

<prop key="hibernate.hbm2ddl.auto">create</prop>

</props>

</property>

</bean>

<bean id="bankAccountDAOBean" >

<property name="sessionFactory" ref="sessionFactory" />

</bean>

<bean id="bankAccountAction" >

<property name="bankAccountDAO" ref="bankAccountDAOBean" />

</bean>

</beans>
Demonstration
To see the application running on the server, use the Eclipse IDE: right-click on the project folder in the project explorer tab / Select Run As ” Run On Server”. The screen below will be displayed in the browser.
A) Now provide the user details and click the “Submit” button.
B) After the account creation, the application fetches the account details from database and displays them.
Pros/Cons of using Annotations based DI
1. The code needs to be recompiled in case there are changes in dependency. In case of XML configurations, the recompilation of code is not required.
2. Annotations based dependency injection is performed before XML injection. So if there are both types of DI used in the code, xml DI will override the previous one.
3. As DI becomes decentralized, if the annotations are used, it becomes harder to trace the dependencies between classes. While in case of XML configurations, the dependencies can be centrally tracked by analyzing the configuration files.
4. When annotations are used in the code, the code provides lot of context and wiring becomes more easy to understand [1].
References
1. Spring documentation: http://static.springsource.org/spring/docs/3.2.x/spring-framework-reference/html/beans.html#beans-annotation-config
About the author
Preeti Shenoy is a Technology Architect working in Infosys. She has more than 10 years of experience in implementing small and large web, portal and middleware projects in Java-J2EE space. She is an avid writer and has written many technical articles and papers. Linkedin profile: http://in.linkedin.com/pub/preeti-shenoy/24/156/327
Pingback: Software Development Linkopedia June 2013